


The steering wheel's got a bit of play in it, there's a clunk over driveway ramps, and the front end feels a touch vague on the 401. That's the kind of moment when a lot of Whitby DIYers start suspecting a control arm, and they're often right to look there first. But a control arm replacement only pays off if you're replacing the failed part, not chasing a noise that belongs to a tie rod, strut mount, or loose hardware somewhere else.
Is Your Control Arm Really the Problem
A worn control arm usually announces itself with clunks, pops, wandering steering, or uneven tyre wear, but those symptoms don't belong to one part alone. A bad outer tie rod can feel similar on the road, and a tired strut mount can make the front end knock just as easily. Mileage helps frame the diagnosis, because lower control arm service life is commonly placed around 90,000 to 100,000 miles, while some OEM-grade arms can last 90,000 to 150,000 miles in favourable conditions, and inspection every 30,000 to 50,000 miles is commonly recommended, with replacement once significant wear appears Detroit Axle lifespan guidance.
Listen for the difference before you buy parts
A control arm noise often shows up when the suspension loads and unloads, such as pulling into a steep driveway, braking lightly over broken pavement, or turning at low speed with one wheel compressed. If the sound is a sharp metallic tap, I'd look hard at a ball joint or a loose mount. If it's more of a dull knock with vague steering, the bushings may be letting the arm shift under load.
Practical rule: if the sound changes when the wheel is turned but the car is stationary, don't assume the arm is guilty. That can point you somewhere else in the front suspension.
On jack stands, check each front wheel for play by grasping it at the 12 and 6 o'clock positions, then again at 3 and 9 o'clock. Movement at 12 and 6 can point you toward a ball joint or bearing issue, while movement at 3 and 9 can point elsewhere in the steering system. After that, use a pry bar carefully against the arm and watch the bushings, because cracked rubber, separation, or visible shift under pressure is more useful than guesswork.
If you want a broader suspension sanity check before you order anything, the suspension repair overview at Carmedics Autowerks is a useful place to compare symptoms against the rest of the front end.
Your DIY Control Arm Replacement Toolkit
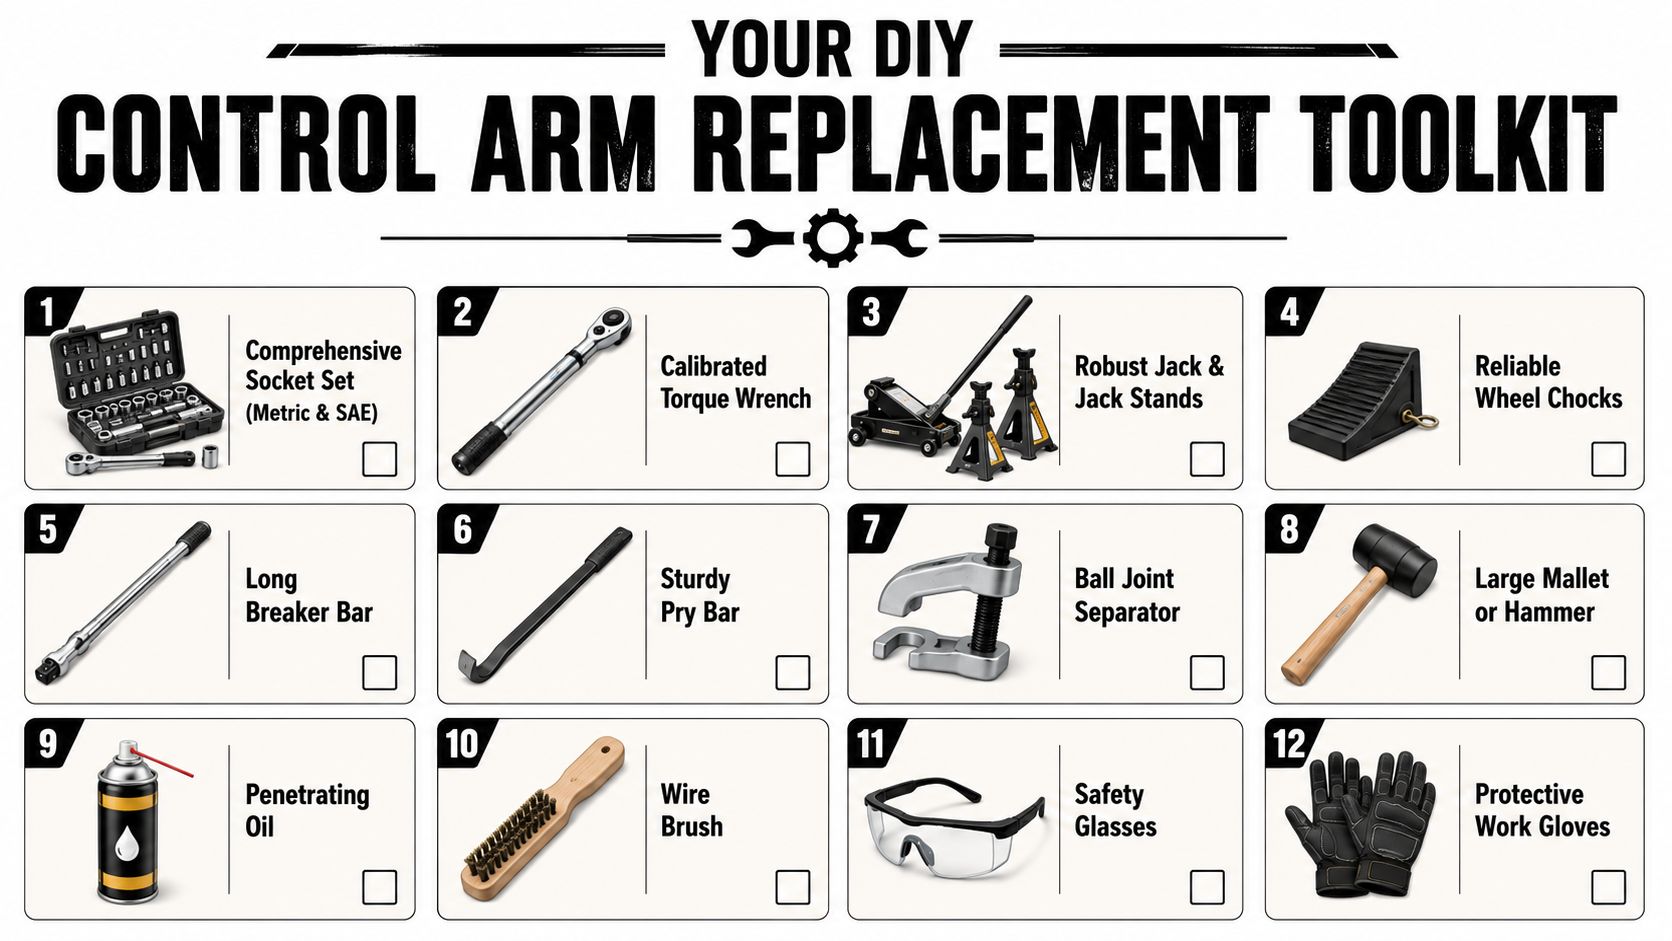
A control arm job gets ugly fast if you start it with half the right tools. The minimum kit is broader than many first-timers expect, because the arm itself is only part of the story. You need enough force to break rusted fasteners loose, enough precision to tighten suspension bolts correctly, and enough safety gear to keep the car from becoming the dangerous part of the project.
The tools that actually matter
- Extensive socket set, metric and SAE: metric for most modern vehicles, SAE only if your platform uses it on specific brackets or aftermarket hardware.
- Calibrated torque wrench: essential for final tightening, because suspension fasteners that are too loose or too tight both create problems later.
- Heavy-duty jack and jack stands: never rely on a floor jack alone, because you'll need both hands under the wheel well.
- Wheel chocks: they stop the car from shifting while you're working.
- Long breaker bar: useful when Ontario rust has fused a bolt to its sleeve.
- Sturdy pry bar: helps test play and persuade stubborn parts during removal.
- Ball joint separator: saves the knuckle from unnecessary damage.
- Large mallet or hammer: for controlled persuasion, not brute force.
- Penetrating oil: start soaking rusted hardware early, not after you've already rounded something off.
- Wire brush: clean threads and rust before you commit to turning a fastener.
- Safety glasses and work gloves: rust flakes and spring tension don't care how careful you are.
Use quality parts, not just cheap ones that fit on paper. The difference between OEM and aftermarket control arms is often about bushings, ball-joint quality, and how closely the part matches the original geometry. If you're comparing those choices, the OEM versus aftermarket parts guide gives a sensible framework without pretending every replacement option is equal.
One more thing matters on newer vehicles, especially in Canada, one-time-use bolts. Have the fasteners on hand before you start, because you don't want the car sitting apart while you hunt for a torque-to-yield bolt or a specialised nut that the original hardware already stretched out.
Good shop habit: buy the hardware before you crack the first bolt loose. A stopped job is how small repairs turn into lost weekends.
Replacing the Control Arm Step by Step
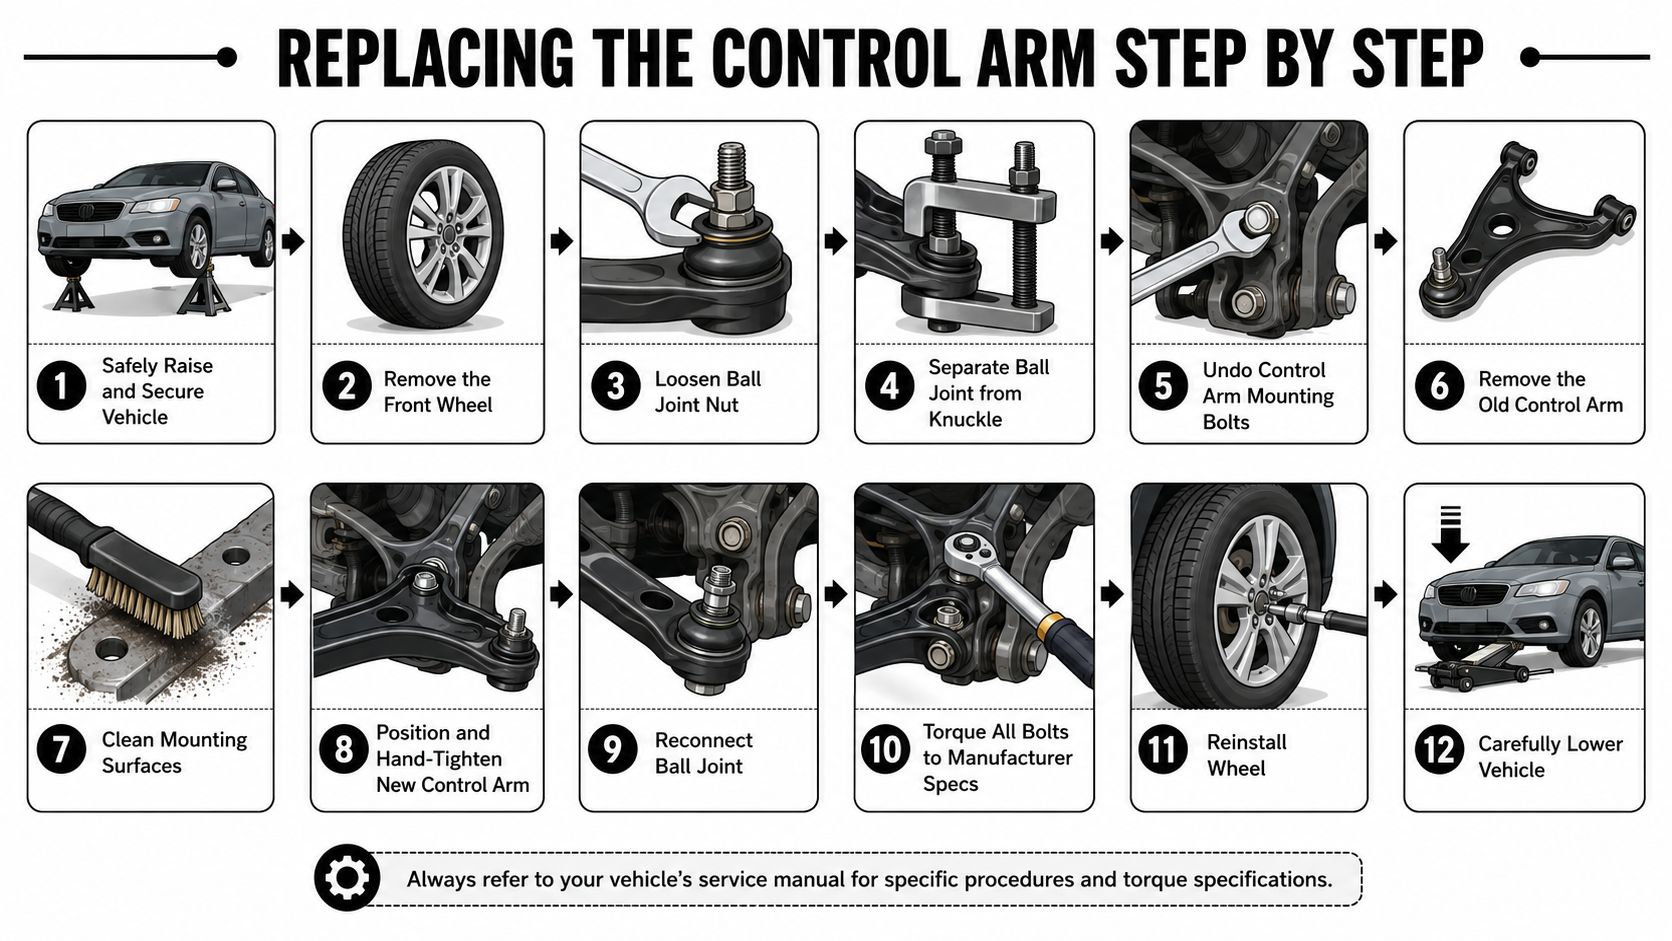
Start with the car on level ground, wheels chocked, and the lug nuts cracked loose before the vehicle comes up. Lift it high enough to work comfortably, then set it solidly on stands and give the car a shake before putting any part of your body near the wheel well. That sounds basic, but it's the difference between a controlled repair and a bad day.
Get the old arm out without creating new problems
Pull the wheel, then inspect the suspension architecture before you unbolt anything. Front and rear arms aren't interchangeable, upper and lower arms aren't interchangeable, and some vehicles use a full assembly while others let you service only certain components. That fitment check matters because arm shape, mounting points, and ball-joint integration are where a lot of mismatches happen.
Soak the fasteners and give them time. On Ontario cars, corrosion can lock the sleeve of the bushing to the bolt, which means a bolt that looks free on the head can still fight you all the way through extraction. Use the breaker bar with a steady pull, and if the bolt starts to round, stop and rethink your approach before you ruin the hardware.
Once the mounting bolts are loose, separate the ball joint from the knuckle with the proper separator tool. Don't hammer on the knuckle like you're driving fence posts, because damage there creates another repair. When the arm comes out, compare the old and new part on the floor before installation, because that's the easiest time to catch a wrong part, wrong bracket orientation, or a missing bushing sleeve.
Thread the replacement in loosely first. The main pivot bolts should stay hand-tight at this stage, because the arm needs to settle in its natural position before final torque. If you tighten it while the suspension hangs, you can preload the bushings and create a ride-height and wear issue that wasn't there before.
The control arm swap becomes a lot cleaner when the geometry side is handled correctly, and that's why a matching steering and front-end setup matters. If the knuckle, rack, or adjacent steering components need attention, the steering rack replacement resource is worth keeping in mind while the front end is apart.
Finish with the suspension loaded
Reinstall the wheel, lower the car until the suspension is sitting at normal ride height, then torque the pivot bolts. Multiple service guides stress that inner pivot bolts must be tightened only with the suspension loaded, because torquing them while hanging can preload the bushing and distort ride height and wear patterns ride-height torque guidance.
Tighten the arm where it lives, not where it hangs.
After that, finish every fastener you disturbed, check the ball joint nut, and confirm nothing is rubbing or twisted. Then roll the car a little and recheck your work before sending it to alignment. If a bolt wants to move, that's your cue to fix it now, not after a test drive.
Avoiding Common Mistakes and Headaches
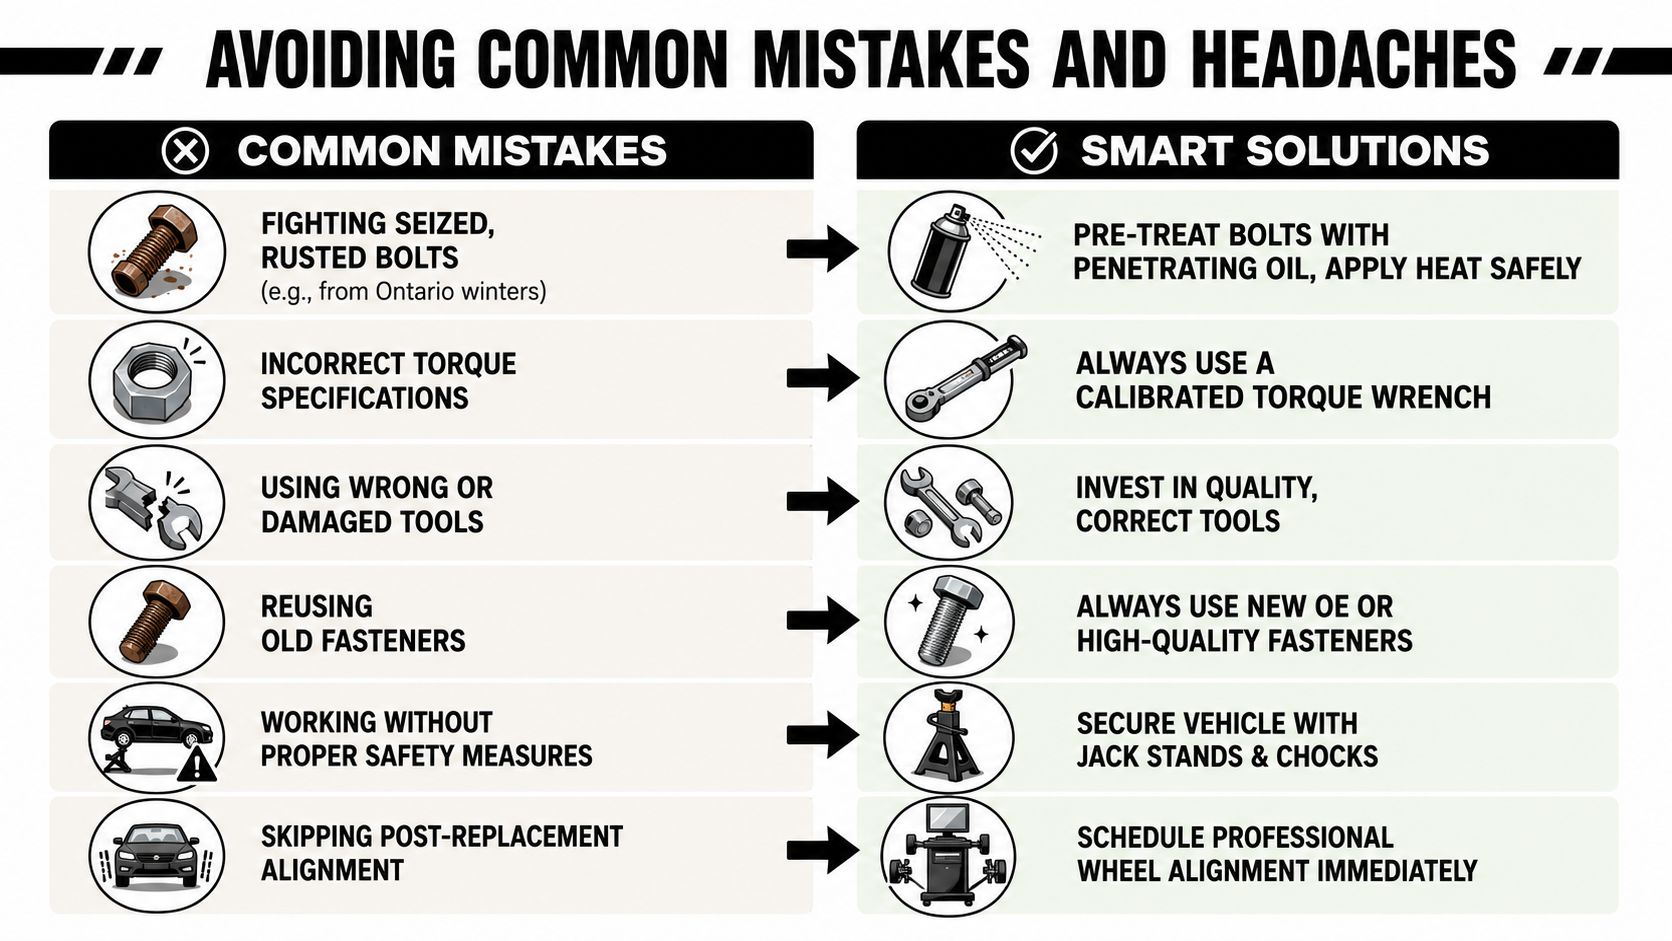
The hardest part of a Canadian suspension job is often not the arm, it's the rust. Ontario winters turn ordinary fasteners into stubborn little anchors, and the usual mistake is attacking them too soon with too much force. Penetrating oil, a wire brush on exposed threads, and patient effort beat a cheater pipe and a broken bolt almost every time.
The mistakes that create comebacks
Modern control arm jobs bring more than just steel and bushings into the mix. Independent service guidance now emphasises that many jobs need one-time-use fasteners, restored attached components like headlight-leveling sensors and stabiliser links, and final torque at a specified ride height, especially on newer vehicles with integrated suspension and driver-assist hardware ZF workshop guidance.
That's where a lot of DIY work goes sideways. People reuse stretched hardware because it “felt fine,” or they leave a sensor bracket loose because it looked optional. On a modern car, that's how a tidy afternoon repair turns into wandering steering, warning lights, or another trip under the car.
Smart habits that keep the job moving
- Pre-treat rusted fasteners early: soak them, brush them, then come back with the proper force.
- Use the right separator tool: it protects the knuckle and usually saves time.
- Replace one-time-use hardware: don't gamble with bolts designed to be discarded.
- Keep attached components organised: sensors, brackets, and links should go back exactly where they came from.
- Torque at ride height: that's what keeps bushing preload out of the repair.
- Plan the alignment before the test drive: the front end won't be right just because the new arm is bolted in.
If corrosion is severe, heat can help, but heat needs control. Aim to release the fastener, not cook nearby bushings or wiring. The same caution applies when working around modern attachments like level sensors or bracketed wiring, because a snapped clip can turn a suspension job into an electrical annoyance.
For drivers who'd rather have the underbody protected before rust starts its next round, Nanak Car Wash rust proofing options are a sensible reference point to review alongside any suspension repair planning.
The True Cost and the Final Alignment
The actual cost of a control arm job starts before the new part goes on. A single arm may look manageable on the parts counter, but once you account for labour, rusted hardware, and the setup needed after the repair, the bill grows fast. That is why a 2026 cost guide matters as a baseline, with independent shops often landing around $300 to $750 per side, dealerships around $500 to $1,200, parts commonly in the $150 to $600 range, and labour usually taking 1 to 3 hours 2026 control arm cost guide.
A DIY repair can still be the right call if you already own the right tools and the fasteners come apart cleanly. It stops being a simple weekend task if you have to buy a torque wrench, separator, jack stands, penetrating oil, and replacement bolts just to finish one side. In Ontario, rust changes that calculation quickly, because seized bolts and corroded sleeves can eat time, break hardware, and turn a budget job into a larger repair. I tell people to price the whole job, not just the arm in the box.
The hidden costs that catch people out
The alignment is part of the repair, not an extra. Once a control arm changes, the front-end geometry changes with it, and that affects steering feel, tire wear, and straight-line tracking. A proper control arm replacement ends with a full four-wheel alignment using a calibrated 3D imaging rack, with the rear axle set first so the shop establishes a zero-thrust angle before front toe and camber are finalized. That sequence is described in alignment workflow guidance.
The final torque matters just as much as the new part. Bushings need to be loaded at ride height, not hanging at full droop, or the rubber starts life twisted and can wear out early. One-time-use bolts also belong in the budget, because reusing hardware that was designed to be replaced is a shortcut that usually comes back later as noise, looseness, or another teardown.
If you are already thinking about corrosion prevention, it makes sense to plan for underbody protection before the next winter season starts working on the car again. That is where a local shop resource like the wheel alignment and balancing window tinting page fits naturally, since suspension repair, alignment, and rust prevention all connect once you want the car to stay stable on Ontario roads.
A proper alignment is not only about centring the steering wheel. It keeps the vehicle settled, protects the tires, and makes sure the repair holds up after the first rough patch of pavement or winter thaw. Skip that last step, and you are back to chasing pull, uneven wear, and a steering wheel that never quite feels right.
Know When to Trust Carmedics Autowerks
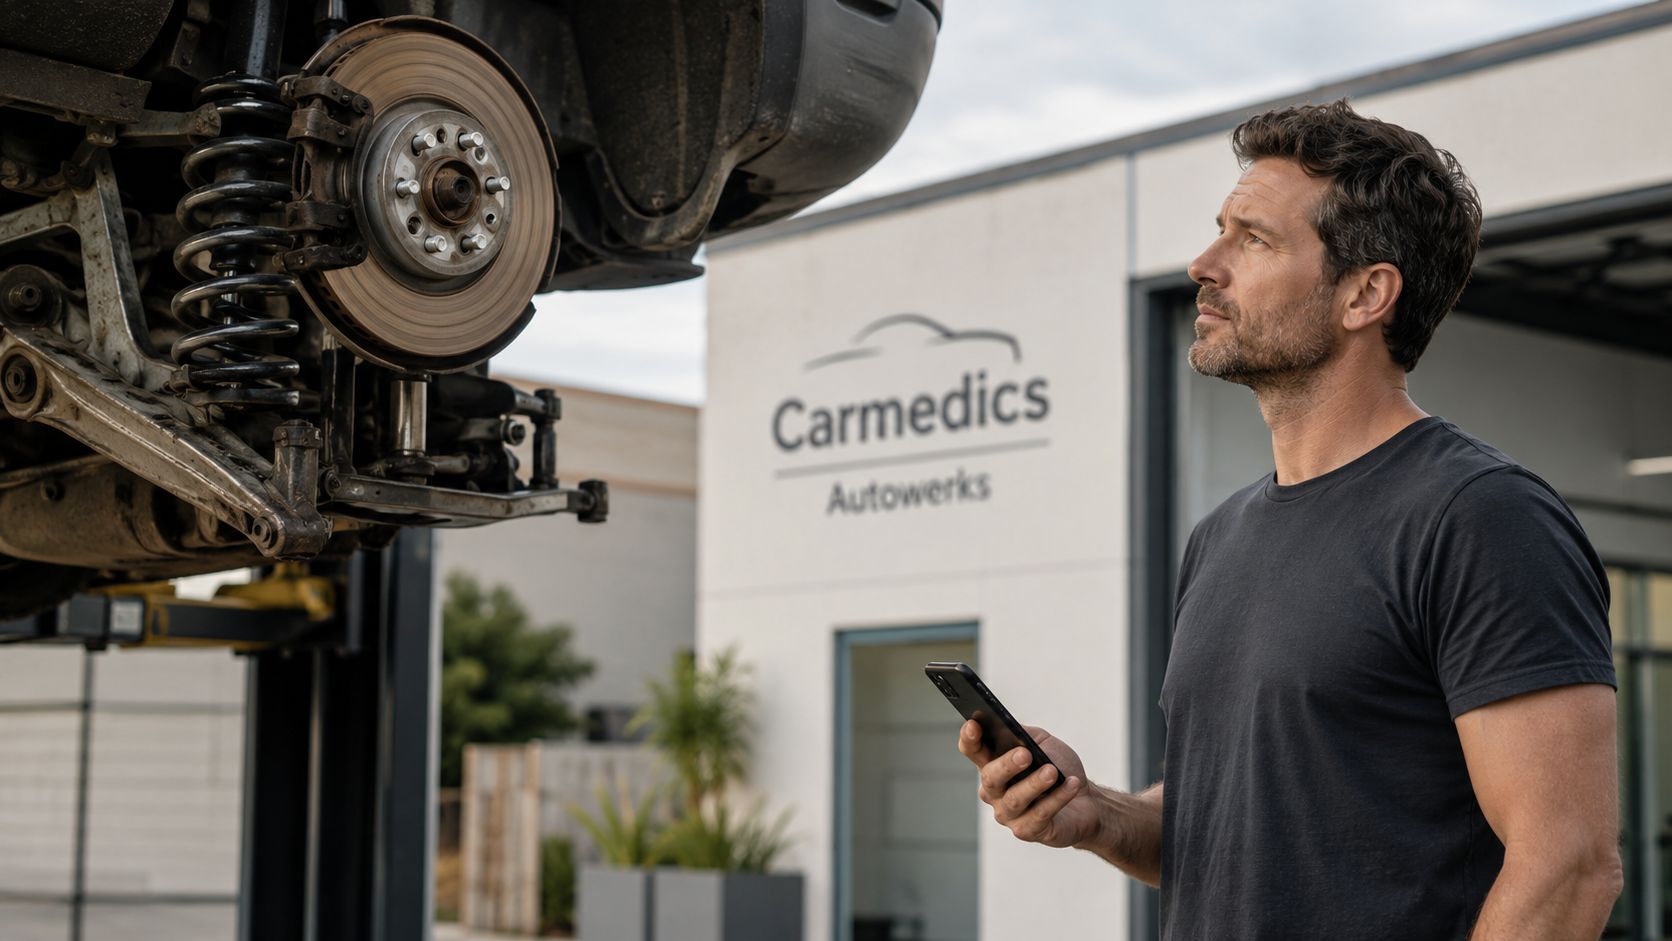
A driveway job stops making sense when the vehicle starts asking for tools, time, or disassembly you did not plan for. Heavy Ontario corrosion is one clear warning sign. Seized bolts, damaged sleeves, and cracked brackets can turn a normal control arm swap into broken hardware and extra fabrication. Air suspension, adaptive damping, and subframe drop work raise the risk too, because each one adds more parts that can fight you during the repair.
The point where the job changes
You should also reconsider the job if the vehicle has integrated sensors, tight packaging, or fasteners that clearly want factory procedures. The repair is only finished when the geometry is right, the hardware is torqued correctly, and the suspension sits without hidden preload. If the final torque is applied at the wrong height, the bushings start life twisted and the new parts wear out early.
A shop with the right lift, alignment equipment, and experience earns its keep on jobs like that. Carmedics Autowerks in Whitby handles suspension repair and can finish the control arm work with the alignment that lets the repair hold up. If one side is already apart, rust is fighting every bolt, or the vehicle needs a more exact setup, the safer choice is professional hands at Carmedics Autowerks Whitby.
The alignment sequence matters too. After the arm is installed, the car needs to go back onto a calibrated rack, with the rear axle set first so the front settings are built from a true reference point, as noted in the alignment sequence guidance. That finish is difficult to duplicate in a driveway unless you already have the space and the equipment to do the job properly.
If your Whitby-area vehicle is clunking, wandering, or showing corrosion that makes the bolts look doubtful, book the repair with Carmedics Autowerks. If you are still deciding, start with an inspection before you buy parts. A clean diagnosis saves more money than a rushed weekend wrench session, especially once Ontario rust and one-time-use fasteners enter the picture.