


Shock absorber replacement usually falls around 50,000 to 100,000 miles, with many shops treating about 50,000 miles as the practical reminder point, and professional jobs often land between $500 and $2,500 depending on the vehicle and parts. If your car rides rough, bottoms out over speed bumps, or a tire shop just pointed out worn shocks, the key consideration is whether you can still drive it for now or whether the suspension is already costing you comfort, tyre life, and control.
A lot of Whitby drivers end up here after the same kind of week. The commute feels a bit floaty on the 401, the rear end slaps hard over a seam in the pavement, or the car noses down too much when you brake for a light. Most shock jobs take 1 to 3 hours per axle at home, but the job only stays straightforward when the fasteners cooperate and the right tools are already in the garage.
When Your Car Tells You It Needs New Shocks
The first clue usually isn't a dashboard light. It's the way the car reacts to normal Whitby roads, one driveway lip, one speed bump, one hard stop, and suddenly the body keeps moving after the wheels have already settled.
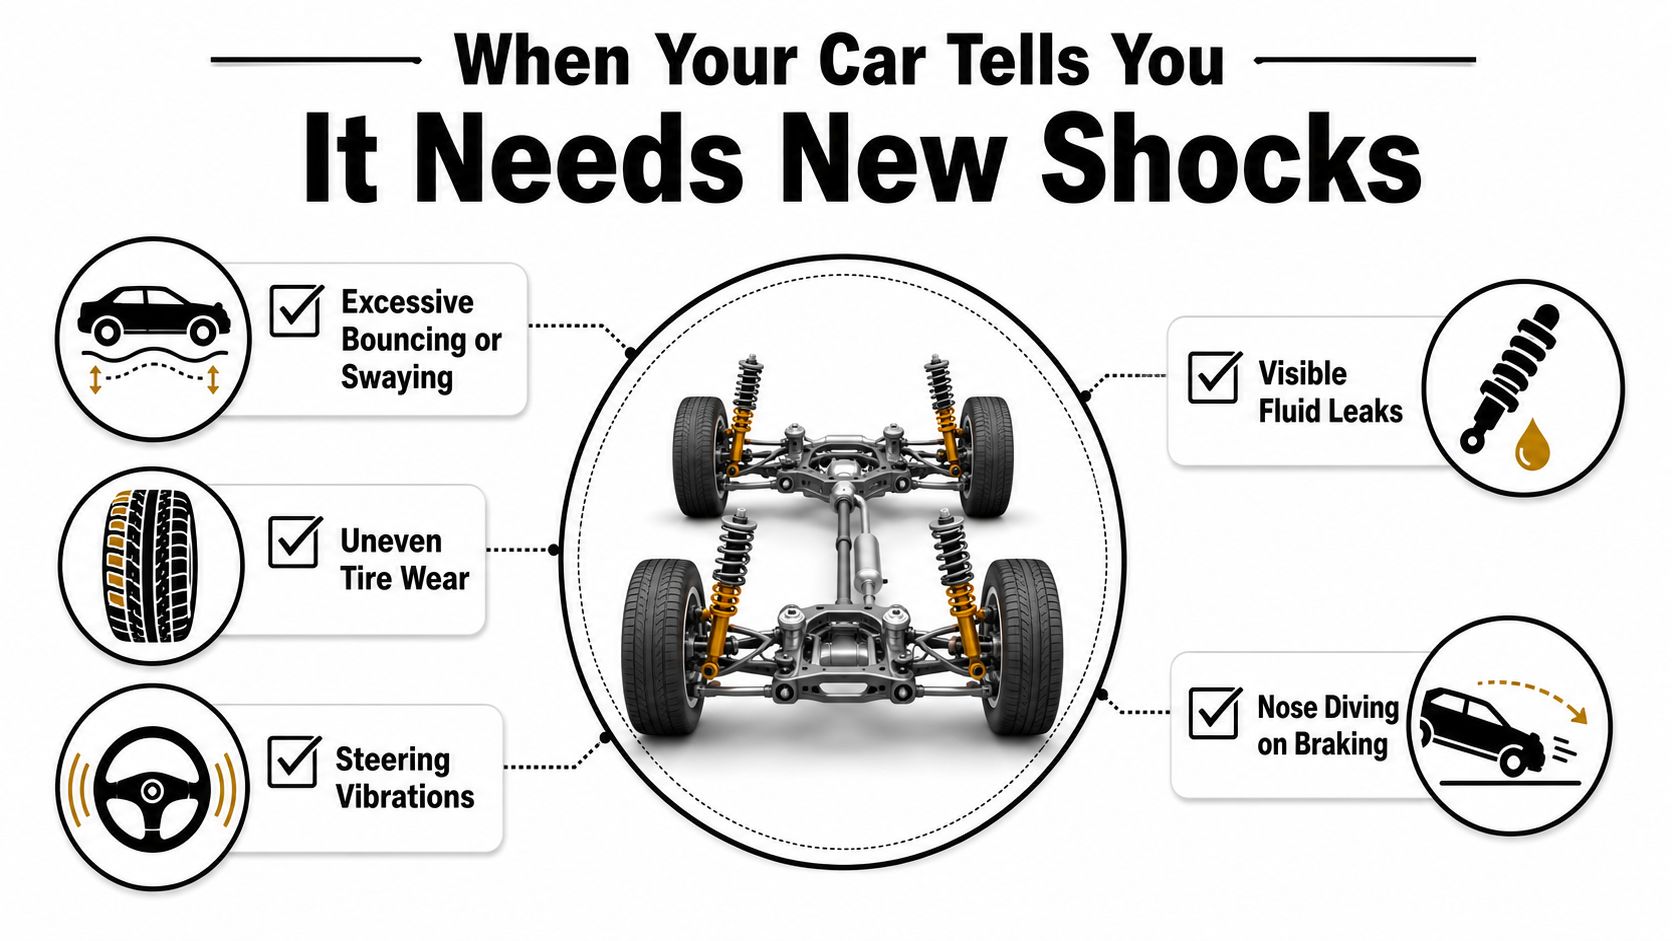
What the car is trying to tell you
Worn shocks rarely fail in one dramatic moment. They lose damping little by little, so the car can still feel acceptable on smooth suburban trips and then feel awful on broken pavement, laneways, or a quick lane change. That's why a driver can dismiss the problem for weeks and still end up with a vehicle that's tired underneath.
A simple driveway check helps. Push down firmly at one corner and release. If the body keeps bouncing instead of settling quickly, that corner deserves attention. Then look at the tyres, because uneven wear often tells the truth before the cabin does. A shock that's not controlling movement well lets the tyre skip and scrub, especially on rough roads.
Practical rule: if the car bounces, leans, or dives more than it used to, treat that as a suspension clue, not just a comfort complaint.
What you can see with your own eyes
Fluid on the shock body is a bad sign. So are cracked bushings, a greasy-looking shaft, or a rear shock that doesn't extend cleanly when the suspension hangs free. A strut or shock that looks wet enough to attract dirt usually isn't something to “watch for a while”.
The road test matters too. A car that feels vague in a lane change, floats after a dip, or pitches hard under braking is telling you the damping is gone. That's the part a lot of drivers miss, because the vehicle may still track straight and never clunk. Comfort and control aren't the same thing.
For fleet teams, the useful habit is to document those small signals before they become a roadside problem, which is why a guide for fleet compliance managers can be handy when inspection notes start piling up. If you want a local repair path instead of a theory lesson, the suspension work at Carmedics suspension repair is the sort of service that starts with those same symptoms and ends with a proper look under the car.
How to think about urgency
Not every worn shock means the car has to stay parked. But “drives fine” on a short commute can hide meaningful wear, especially when the road surface is rough or the vehicle is carrying family weight, tools, or cargo. If only one corner is clearly leaking or bouncing, that corner may be the first one to fail. If the car feels loose all around, the whole axle set is probably talking to you.
A quick scoring method works well. Bounce check, tyre wear check, leak check, then a steady highway lane-change test. If two or more of those are obvious, the repair stops being optional.
Tools, Parts, and Setup You Actually Need
Half the frustration in a shock absorber replacement job comes from not having the right support under the car. The actual hand tools matter, but so does the setup. If the suspension is hanging in a bind, you'll fight the shock bolt the whole way out and make the job harder than it needs to be.
You need three buckets of gear. First, a floor jack and jack stands, because the car must sit securely on level ground. Second, hand tools, especially the right sockets, a breaker bar, and a proper torque wrench. Third, consumables like penetrating oil, because rusted fasteners are normal in our climate, not a surprise.
A second jack is the underrated item. It lets you support the control arm or axle so the suspension sits at ride height while you remove or install the shock. That takes load off the fastener and keeps the new part from being forced into a bad angle.
| Budget item | What it does | Why it matters |
|---|---|---|
| Jack stands | Holds the vehicle safely | Keeps the car from settling while you work |
| Second jack | Supports the axle or control arm | Removes binding from the shock mount |
| Penetrating oil | Loosens crusted fasteners | Saves time and helps prevent broken hardware |
| Torque wrench | Tightens to spec | Stops stripped studs and loose mounts |
Choosing the right replacement part
Shocks and struts aren't all the same. Some drivers want a firmer feel, some want a softer ride, and some just want the vehicle back to stock behaviour. OEM-style parts usually keep the original ride character closer, while aftermarket parts can be a sensible pick when you want availability or a different damping feel. If you're comparing those choices, the OEM versus aftermarket parts guide gives a useful framework.
If the old part is visibly worn, don't let “the car still feels fine” talk you out of measuring the replacement carefully. Length, mount style, and stroke all matter.
For Whitby commuters, the decision is usually simple. Buy the correct part for the axle, replace in pairs, and don't skimp on the hardware that keeps the job safe. Carmedics Autowerks Inc also supplies suspension repair work for drivers who'd rather have the parts matched and installed in one pass.
The Actual Replacement Workflow
A proper shock job starts on level ground, before the wheel is in the air. Crack the lugs loose first, then lift the vehicle and set it on stands that do not wobble. Pull the wheel, then support the control arm or axle with a jack so the suspension is not hanging at full droop.
That support step saves time later. If the suspension is left under load, the bolt binds, the stud twists, and the upper mount can get chewed up by an impact gun. Once the car is held correctly, spray penetrating oil on the upper and lower fasteners and give it a moment to work.
Pull the old unit cleanly
Unbolt the lower mount first when access allows, then move to the upper mount. Work the shock out through the wheel well without forcing the brake hose, ABS wire, or nearby trim. Before the new unit goes in, compare the old and new parts for extended length and mount orientation. A replacement that looks close but does not match the stroke can limit travel or bottom out early.
If the design calls for it, prime the new shock by hand a few times before fitting it. That helps the unit operate correctly from the first drive. Then install the new part in reverse order and torque everything to specification.
Do not skip torque values. Loose hardware is a comeback job, and over-tightening creates a different problem that costs more to fix.
What usually bites people
The lower fastener is often the easy one. The upper stud is the one that gets cross-threaded when somebody reaches for an impact too early. Another common mistake is lowering the car onto an unsupported axle, which loads the new shock crooked and makes the last bolts fight you. The final mistake is rushing the road test and never checking the wheel well for clearance, noise, or a shifted mount.
After the install, road test the car on familiar streets, then recheck the fasteners. If the suspension geometry has changed, the alignment conversation starts right there, and a wheel alignment and balancing check should follow before the job is considered finished.
Why You Should Always Replace Shocks in Pairs
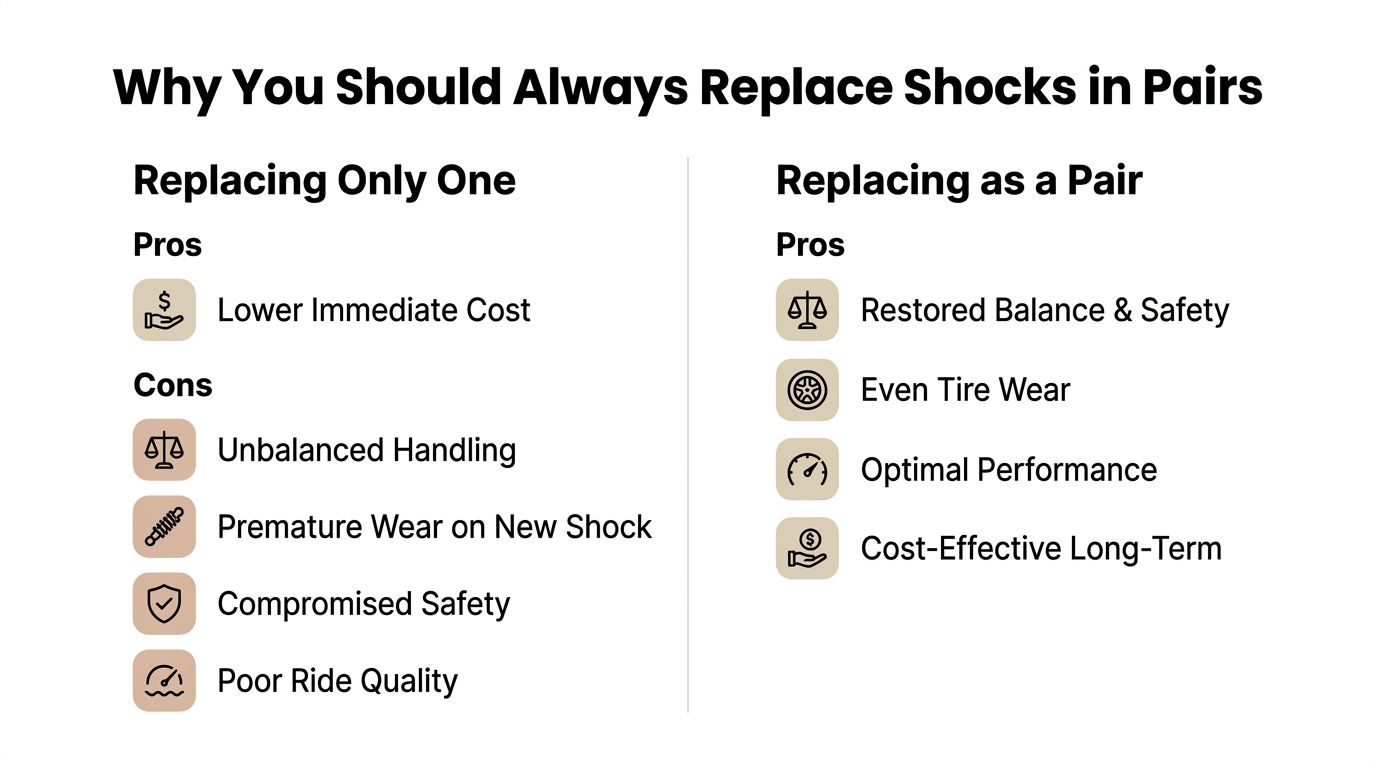
One new shock and one tired shock don't behave the same way, even if both sides still bolt in cleanly. The axle ends up damping unevenly, and the car shows that mismatch in body motion, braking dive, and tyre wear before the driver always notices it in the steering wheel.
Replacing just the bad corner feels cheaper on paper. It also creates the most common comeback pattern, the new part gets blamed when the old one on the other side keeps the axle imbalanced. On a wet or salt-heavy Whitby road, that imbalance is not worth gambling with.
Same axle first, both axles if the wear says so
The standard practice is simple, replace shocks in pairs on the same axle. If the fronts are worn and the rears still measure well, keep the service focused. If the car has high mileage, obvious leaks at multiple corners, or a long list of suspension fatigue, doing both axles in the same visit can make more sense.
One reminder from the parts side is worth keeping in mind. Industry guidance notes that many drivers end up in the replacement window by mileage rather than age alone, so the side that looks “okay” may just be behind the curve by a few months.
Why the shortcut costs more later
- Lower immediate cost sounds good, but it often becomes a second labour bill.
- Unbalanced handling shows up in emergency braking and fast lane changes.
- Premature wear on the new shock happens because the older mate is still dragging the axle.
- Poor ride quality stays in the car, so the owner pays for half a fix.
Replace the axle as a set when one side is clearly done. The car handles as a system, not as a collection of unrelated corners.
DIY Versus a Professional Shop
A shock job looks manageable right up until the fasteners fight back. If the car is a clean, straightforward daily driver and you've got a solid garage setup, the work can stay in DIY territory. Once rust, seized hardware, or a full strut assembly enters the picture, the job stops being simple and starts eating time.
| Criteria | DIY | Professional Shop |
|---|---|---|
| Time available | A Saturday morning can work if the hardware cooperates | Faster turnaround when the bay and tools are ready |
| Tool inventory | Basic sockets, stands, torque wrench, second jack | Full suspension equipment and lift access |
| Alignment needed | Often yes after strut or geometry changes | Usually handled as part of the process |
| Access to lift | Limited to driveway or garage setup | Two-post lift makes the work easier and safer |
The test is not whether you can unbolt a shock. It is whether you can support the suspension correctly, keep the ride height in check, and put everything back with the right torque. A competent home mechanic can handle a straightforward pair swap on many cars and SUVs. The margin gets thin when the car has corroded upper mounts, an integrated strut assembly on a newer SUV, or a setup that will clearly need alignment work after the parts go in.
For drivers who also want a reminder about what owners are expected to maintain, the driver responsibilities in Florida page makes the larger point well. Keeping a vehicle safe and roadworthy is part of ownership, even if the local weather and road conditions are different from Florida.
If you want a professional eye on the job, a certified auto mechanic is the right call when the hardware is stuck, the suspension layout is tight, or the car needs more than a simple swap. That matters on Whitby commuter cars that see winter salt, because shortcuts on suspension work tend to show up later as noise, uneven ride height, or a second tear-down.
My rule in the bay: if you do not have a second jack, a good torque wrench, and the patience to work rusted fasteners loose without rounding them off, stop before the job turns into a recovery mission.
A proper shop earns its keep by supporting the suspension, torquing the fasteners correctly, and checking the car after the install before it leaves the lot. If you choose to do it yourself, keep the standard high, follow through on the alignment if the job calls for it, and do not call a half-finished repair maintenance.
Bringing Your Car to Carmedics Autowerks in Whitby
A good repair visit starts with a clear inspection and ends with a car that tracks straight. At Carmedics Autowerks Whitby, the job should begin with a suspension check, the worn shock or strut should be identified, the correct parts should be ordered, and the replacement should be handled per axle with a road test after the install. If the suspension geometry has shifted, a four-wheel alignment needs to be part of the estimate before the work is approved.
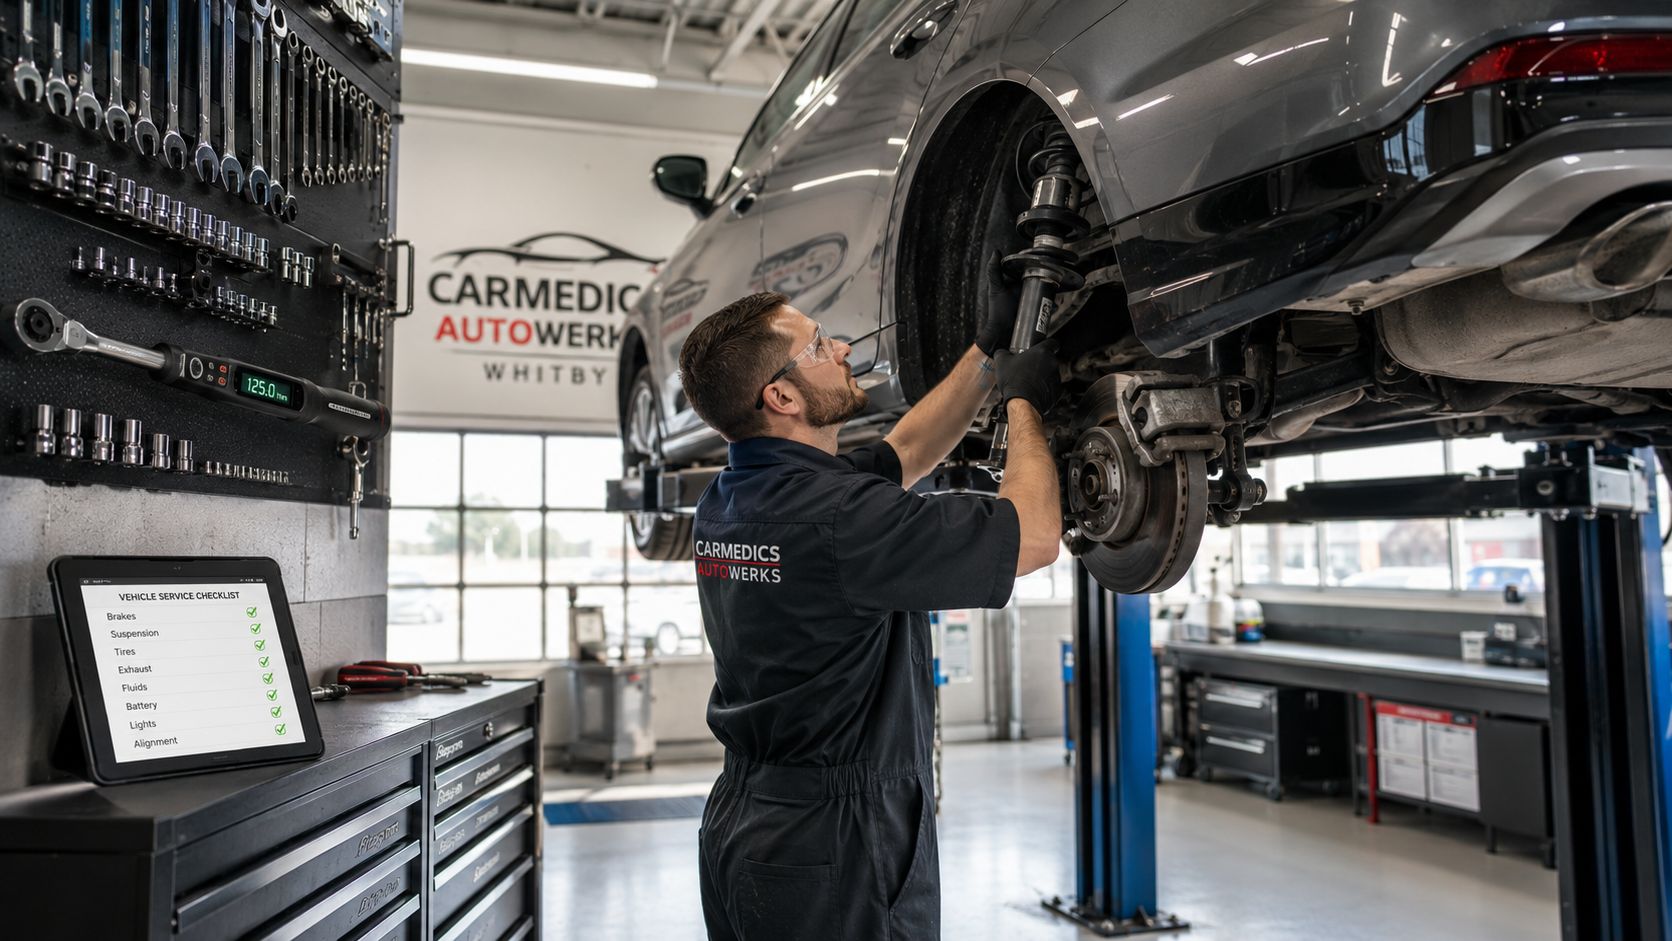
What the appointment usually looks like
A Whitby driver usually wants two things, a clear answer and no surprises. The shop should inspect nearby wear items while the suspension is apart, because control arm bushings, sway bar links, and top mounts often reveal their condition once the old shocks are out. That is normal, and it is better to catch it before the car comes back for another teardown.
The practical value of a shop visit is plain. The vehicle is on a lift, the fasteners are handled the right way, and the technician can decide whether the wear pattern points to one axle or a broader suspension refresh. That saves time for drivers who do not want to fight rusted hardware in their driveway.
When the pro bay makes more sense
- Rusted fasteners that will not come apart without heat or patience.
- Strut assemblies that need more than a basic bolt-out, bolt-in approach.
- Alignment-sensitive repairs where the car needs geometry checked after the install.
- No usable workspace at home, which matters more than people admit.
The car should leave with the ride settled, the steering centred, and the suspension hardware torqued. That is the standard, and it is the reason many local owners hand this job to Carmedics Autowerks in Whitby instead of turning it into a weekend experiment.
Your Next Move With This Job
The decision is usually clear once you sort the clues. Diagnose carefully, replace in pairs, respect the torque wrench, and book an alignment when the suspension geometry changes. If the car is only mildly worn and you've got the tools, a Saturday morning in the driveway can still be a reasonable plan.
If the fasteners are rusty, the parts are a mismatch, or the vehicle needs a proper road test and alignment check, take the simpler route and put it in the shop calendar. Carmedics Autowerks is the local answer for Whitby drivers who want the work done cleanly, with the inspection, replacement, and follow-up checks handled in one place.
If your car is riding rough, leaning too much, or showing the early signs of worn shocks, Carmedics Autowerks Inc can inspect the suspension, replace the parts, and tell you whether an alignment is needed before you leave. Visit Carmedics Autowerks Inc and book the repair before a small handling problem turns into a bigger suspension bill.